Last Updated on June 15, 2021 by James
Many woodworkers use their router table to create decorative edges on boards, such as beadboards and ogee molding. However, the truth is that it can also be used for more practical purposes – namely, jointing boards. The table saw is a great tool for cutting boards to length but if you need joinery, then it’s time to break out the router table.
Q&A: Is it possible to use a router table as a jointer? Here’s the answer, courtesy of the Woodworker’s Journal.
John Brock: Yes, a very narrow jointer, good for edge joining but too narrow for face jointing. Make sure your infeed and outfeed guides are long enough and rigid enough, then you can set it up like a jointer layed on its side.
John Swanson: It is very easy to joint a board on a router table. It requires a straight bit and an offset fence. Make multiple passes, cutting on the left side of the bit until the edge is jointed.
Richard Jones: Yes. You can use an inverted table-mounted router to straighten narrow edges. Offset the outfeed table by the depth of cut set by the infeed table.
From the Woodworker’s Journal eZine 2005 archive
When you’re working on a project that requires boards to be the same length, it’s better to joint them first so they don’t shrink during their time in your workshop. There are ways of doing this without using power tools – for example, by dragging one board against the surface of another with clamps or by rubbing two pieces together over sandpaper laid flat on the table – but these methods can take a long time and aren’t always foolproof. The best method is to use your router table as a jointer! Follow these quick steps to learn how:
Preparation Steps To Set Up Router Table As A Jointer
It is a very simple process to set up your router for jointing edges, follow the steps below to have your router jointing edges quickly and easily.
1. Unplug
The first thing which should be done before changing any tools is to unplug the router table. This prevents any accidental movement when working with the tool bit, preventing any harm from coming to you or those helping you.
2. Tool Bit Selection
The second step is to choose the router bit you will be using to create the jointed edges, there is a huge range of bits available to purchase, however it is better to use a flush-trim bit as these have been known to give the best results.
There are 3 main choices for that perfect jointed edge, we recommend using either a 4-degree sheer angle, a straight bit with no angle or a three-quarter-inch flush-trim bit. The idea behind using these sheer angle bits is that they can carve the wood from stock rather than shaving it off like a jointer blade would.
Note: Larger diameter bits will deflect less, helping to give a smoother and steadier cut.
3. Adding the Bit to the Router
Once you have selected the type of bit you think best suits your needs, it is time to place the router bit in the router. Once you have placed in the bit, raise it so that it is just above the thickness of the wood you are attempting to joint.
4. Offset the Fence
In order to use the router table as a jointer, it is important that you offset the router’s fences so that they are uneven. In most cases, it is best to offset the infeed fence, as this will give a cleaner edge when running the wood past the router bit.
Setting the router to a small offset will help give you better accuracy when passing the wood through, although this may take more passes, it is better to have more control over the amount shaved off each time. The left side of the fence must be set flush with the router bit cutting plane.
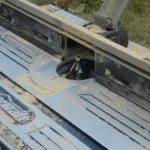
If your router table is flat and doesn’t contain fences, then it is super simple to set up fences. You will need a piece of plastic laminate and a straight edge. When looking at a jointer, you can see that it has an out feed side which is set to the height of the cutter and has an adjustable infeed table. The out feed being used to support the cutting piece and the in feed side to set the amount of material the blade cuts. (The outfeed side is on the other end of the fence, away from where you’re feeding it in.)
This offset created between the infeed and out feed tables can be created by attaching a piece of plastic laminate to the out feed of the router table. Creating a slight bevel on one end of the laminate will simply allow the material to pass over the plastic without catching. We suggest using carpet tape to hold the laminate to the fence, this will prevent there being any inaccuracy between the bevelled end and the cutting edge.
5. Bring the Fences Closer To the Cutting Bit
For a better quality cut, it is best to bring the fences closer to the cutting blade, this will help produce a more smooth edge with each pass. The important thing to note is that the fences shouldn’t touch the blade, but should be as close as possible.
6. Testing the Cut
The next step is to get a piece of scrap wood and test the overall cut of the router table. This testing phase will help you to figure out whether you need to move the fences more or change the height of the cutting bit.
Place the rough side of the wood against the infeed fence and with the router turned on, pass it through the cutting bit, this should now create a smooth edge. The outfeed fence, will help to support the cut piece, which means that the entire piece of wood will be stable. Allowing for a nice and clean, square jointed edge.
7. Adjustments
Take a look at the test board which you have just passed through the router table, is it a clean, straight and square cut? If not then a few adjustments need to be made to both the fences and the cutting blade to ensure that you get the best cut possible. Once you have done this retest using the method in Step 6, repeat until you have the best cut possible from your equipment.
Quick Steps to Use To Router as a Jointer
- Position your workpiece with one end flush against the fence of the router table
- Adjust the height of your bit so that it is just barely above the surface of your workpiece
- Turn on the power switch and slowly feed your workpiece through under power
- Hold the workpiece against the fence with one hand and use your router to cut away some wood from both edges. It’s a good idea to make cuts in different directions so that you can remove as much material as possible.
- When there is no more space left between the table and your fingers, release pressure on the workpiece but keep it flush up against the fence. Now tilt your hands inward slightly (or move them further apart) while still pressing firmly down onto piece until all of its surfaces are touching evenly. This final step will ensure that you have removed enough material for each side of your board before it starts shrinking again!
- This easy process should take about five minutes when using a small router bit – which is much quicker than the old method!
When it comes down to using the router to smooth the edge of the wood, it can be used in the same way you would use the router to perform any other operation. Keeping the base of the wood flat upon the table, moving the wood with a slow and unforced feed rate, this will help to reduce splintering or denting the wood.
Conclusion
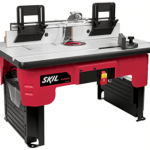
Using a router table as a jointer is great for those people who are working in a tight space, meaning that there is no room for any additional equipment or those who are on a tight budget. The only disadvantage to using a router table in this way is the time it takes to ensure that the fences are set up with the correct offset. Depending on the type of router table you have, for example, if you are in possession of a Rockler router table, this whole setup will be quick and stress-free.
When it comes to using a router as a jointer in the long run, it is not a sustainable method. This is due to the bits used and how the jointing of wood can cause blunting of the bit’s blades. However, this method will still allow you to produce edges that are ready to be glued but, it is still recommended that you purchase a dedicated jointer table if you are looking to joint wood on a regular basis.